I'm linking up with Jen Ross,
Teacher By the Beach, to talk about managing centers! I know I am a little late to the party, but it's been a busy week!
Since I teach third grade, I don't do traditional centers so today is going to focus on my ELA block and how I do Daily 5 rotations in my classroom.
I have only been doing Daily 5 for two years, but I am so happy I made the leap! My students love the aspect of choice that it allows them; not just in what they do, but also in where they get to sit to do their work. I implemented flexible seating this past school year as well so it all fit really well together.
First, know that I do Daily 5 in conjunction with Fountas and Pinnell's balanced literacy model. Daily 5 takes place during my small group portion of the guided reading model. It also takes several weeks to get the students introduced to all 5 rotations.
What is Daily 5?
The five components of Daily 5 are:
* Read to Self - Students read silently on their own
* Work on Writing - Students write about whatever they want silently and on their own
* Read to Someone - Students pick someone to read with and practice fluency and comprehension
* Work on Words - Students work on phonics and word skills
* Listen to Reading - Students get on technology and listen to books or do some kind of reading program
You will want to introduce them to your students in this order. Here is a set of plans that I used this year to help me introduce each component to my students. Click the picture below to download the free Daily 5 plans.
Building Stamina

During read to self, you want to make sure students can keep their stamina for a set period of time. You will want to determine the goal based on your students grade level or however long your reading group lasts. My reading groups last for 20 minutes, so my students goal was 20 minutes. Don't be surprised if they can't last longer than 1-2 minutes the first day. I used this stamina chart this year to track our Daily 5 stamina. I made the chart into an anchor chart and I changed mine so that it said Daily 5 stamina so that I didn't have to make a chart for each component. You can do whatever works best for you. As soon as you see a student who is off task, you record the time, bring the class together, discuss what went wrong, how they can improve for next time, and try again. Do not try more than 2-3 times in one day. If they break their stamina more than that, just carry on with the rest of your day and try again tomorrow. You can have them keep reading to self, or working on writing, or whatever component you are on, but after they have broken stamina a few times, you just won't track it again that day.
About Daily 5 in my Class
I only have time during my ELA block for two small groups which means my students can only do two Daily 5 components a day, unless they are meeting with me that day.
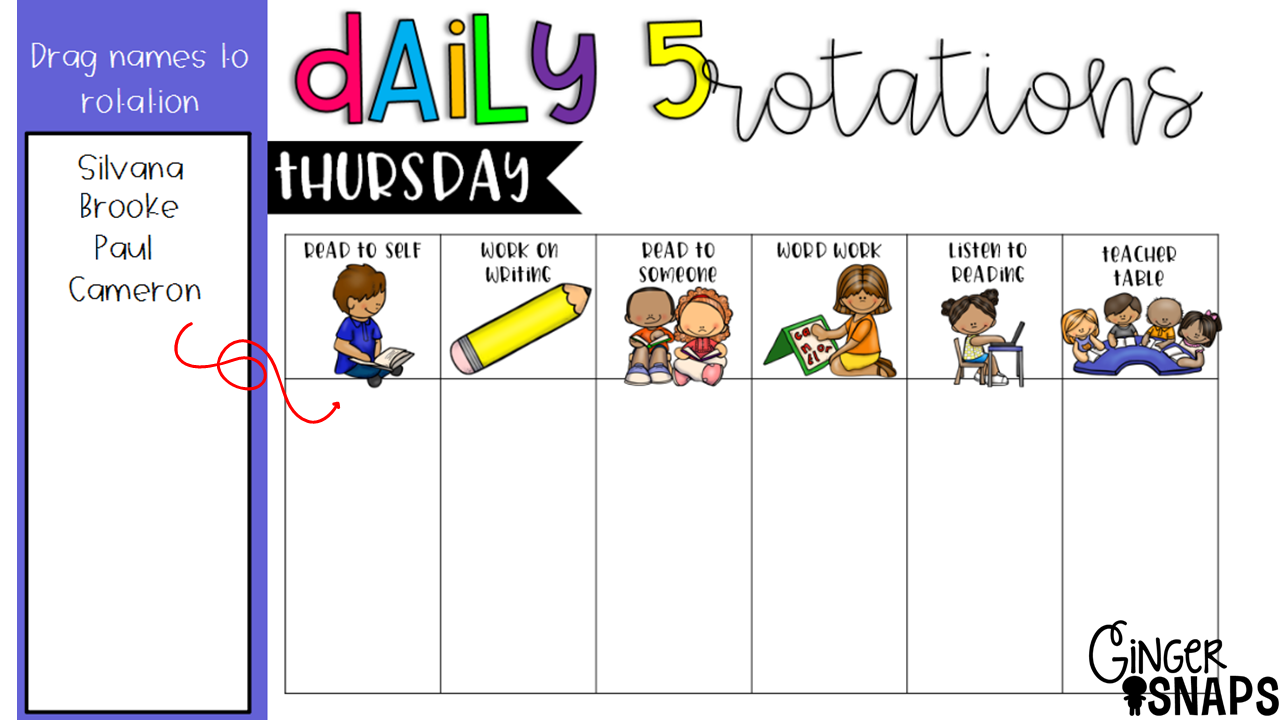
One of the major components of the Daily 5 structure is that they have choice in what they get to do. Obviously they don't have a choice if they are meeting with the teacher, but I never pick what rotation they get to do unless the other rotations are full. I do set a limit to each component so that not everyone is in the same place. I post this flipchart on the board and students come up to the board and select where they go.
Setting up Daily 5
While you are introducing each component, you will want to have students model do's and don'ts for each component and have students discuss what they notice. You will also want to create an anchor chart of students expectations as you introduce each component of Daily 5 with your class. I created anchor charts with my students and then printed out some cute ones I found on TPT. It is recommended that you create them first before you post them in the room.
Read to Self

This is what your students should look like during read to self. My students usually have some sort of response to do during read to self that correlates to our guided reading mini lesson for the week so that they have some sort of purpose for reading. I usually give them the whole week because not every student gets to do read to self every day because sometimes they are meeting with me or doing another rotation. My students get their books as part of their morning routine. We call it "book shopping." Each student has a book bin that they keep above their cubby. They are assigned a day of the week to pick their books and they know they aren't allowed to go back if they don't have enough books for the week. You want to make sure to talk about picking "just right" books with your students at the beginning of the year. If they read all of their books, they just reread what they have. I require my students to have at least 1 chapter book to make sure they have something that will get them through the week.
Work on Writing
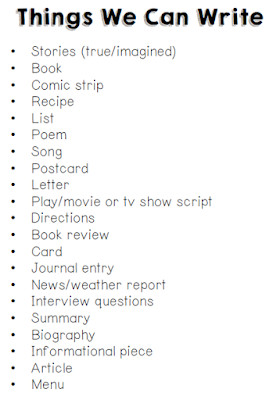
For Work on Writing, we come up with a class chart of things to write about and post it in the classroom. I also make a copy of it and the students glue it in their notebooks. For an editable copy of this list, click the image below:
You will want to make sure that you check students notebooks regularly to make sure they aren't doing the same type of writing over and over. This is something great to do during your weekly conference time.
Read to Someone
This rotation is generally a favorite! I limit Read to Someone to only 2 partners per rotation. It can get loud and distracting if I am trying to do a reading group. During this rotation, you will want to have students practice comprehension. It is also great for practicing fluency. While you are introducing Read to Someone with your class, you want to make sure you discuss how to help your partner when they get stuck on a word. For comprehension, you can use questioning dice or comprehension spinners like the one posted below.
Working on Words

Word Work is also a very popular rotation in my classroom! I also limited it to a few students because I didn't have the space for them at the word center.
My Word Center has scrabble tiles, a whiteboard with magnetic letters, two Scrabble Flash games, markers, crayons, multi-colored whiteboard markers, dice, and crayons.
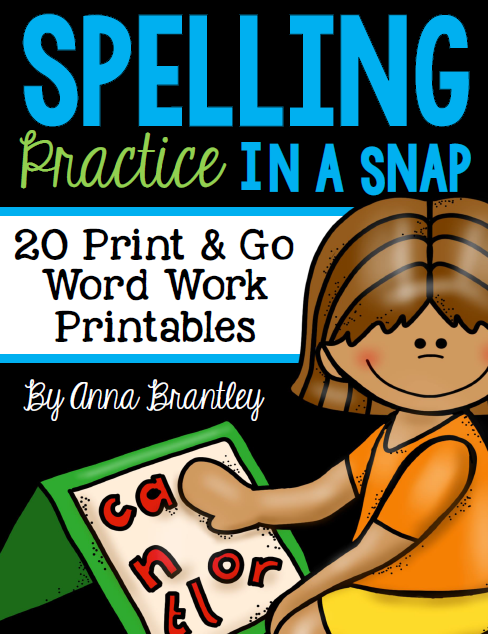
I used Anna Brantley's Spelling Practice in a Snap for the last two years in my word center and it has been so easy and such a life saver! I printed all of the pages and put them in page protectors. Many of the activities are dry erasable in the page protectors. A couple of the activities, I had to make multiple copies of and put them in the page protectors so that students could take them out and use the crayons and markers to complete them.
You can purchase Anna's Spelling Practice in a Snap by clicking her picture below!
Listen to Reading
During Listen to Reading, students get on the computer or other device and listen to stories. If you have a books on CD, they can do this as well or have them do another online reading program. Some great resources for Listen to Reading are RAZ-kids if your school has a license, Epic (which is free for teachers), Moby Max, Front Row ELA. This year, my school purchased a program called Imagine Learning so our students did that during Listen to Reading.
Here are just a few snapshots of Daily 5 in my classroom once we had learned about all 5!
Tracking Daily 5
You may want to have your students keep track of what rotations they have visited that week so they are making sure to hit everything. I have kept a checklist in the past, but that can be time consuming. I was given this chart to help students keep themselves accountable. It is on the last page of the free Daily 5 plans at the top of this post if you want to download a copy. They print 4 to a page so you don't have to kill too many trees! You can print them out for your students and have them keep them in a folder or glue them in their reading notebooks. I would have students use a crayon, colored pencil, or marker so that they can't change the rotations they have visited. I know your students would NEVER do that, right?!
I promise you won't regret implementing Daily 5 in your classroom. Your students willy be fully engaged! I know many teachers take away the option of choice and I highly recommend that you don't. That is part of the beauty and success of it.
This is just a little bit about how I do Daily 5 in my classroom. I would love to hear how you do things! I know I always have room for improvement!
Managing Guided Reading
Over the years, I have created some resources to help make guided reading time a little bit easier for myself. This year, I made tabs for my student's notebooks. We took all of our notes and responses in one spot and they were easy for me to collect and grade.
This year, I plan on adding more tabs for Writing and Word Study.
Here is an example of my guided reading group tracking sheet.
You can grab these tabs, my guided reading group tracking sheet, and many of my other guided reading resources in this mini kit. It is available in my shop for $3! Just click the image below to grab your set!
The file is editable and includes the following:
*Guided Reading Binder Cover
*Assessment Summary Form for benchmarking
*Reading Notebook Tabs & guidelines printout
*Reading Group Tracking Sheet
*Group Meeting Sheet
*Running Record Form
*Student Anecdotal Notes Options
*Guided Reading Templates
** Not everything is pictured in the preview below.
Win a copy of the Guided Reading Resources by commenting and telling me a tip for managing your Daily 5 or Guided Reading time! Please leave your email in the comments! I will choose a winner by Sunday!
I hope this post has been helpful for you.
Congratulations to comment number 3! I will email the Guided Reading pack!

 I am linking up with my friend Jen Ross over at Teacher By the Beach again this week to talk about Word Walls.