

It's almost that time for most of us. I have been enjoying my summer.....working a little bit, watching LOTS of Netflix, spending some time at the pool. We are about to spend a week at the beach and then I am heading back to set up my classroom.
I thought I would hop on here and write a little post today about some things that you might find helpful for heading back to school this year.
I am going to share my top 5 things that help get me organized or on track for back to school.
1) Meet the Teacher
2) Set up Tips
3) Parent Communication
4) Icebreakers
5) Read Alouds

Meet the teacher is crucial. I often feel so stressed out that day. I'm running around making sure the finishing touches are done to my classroom. I'm a TAD OCD about that frankly.
But more importantly, I make sure that my Meet the Teacher packet is assembled. I have several forms that I have created and I send those home in the packet. The school also requires us to send home certain things. I created an all in one file with all of my back to school forms to include in your meet the teacher packet!


I print all the forms on brightly colored paper and then place them all inside a large manila envelope with the checklist taped to the outside with students names on the front. See more about the checklist later...
Parents sign in, find their packet, and fill them out if they choose to. I don't require them to because the school will require them to fill out tons of paperwork already. Once they have picked up their packet, filled out or not, chatted with me, they visit my whiteboard where there is a wishlist of supplies for me beyond what is on the class supply list. I place the stars on magnets and parents just snag one on their way out! This is included in the Back to School forms packet.


This is what the checklist looks like on the front of the envelope. I don't remember who I got this idea from years ago, but I LOVE it. It helps parents know what things in the envelope NEED to come back filled out and then what things in the envelope are just for reading and can be kept at home. The checklist is fully editable and is included in the Back to School Forms packet as well.
Whichever packets are left also help me know which students didn't attend Meet the Teacher.

You can purchase my Back to School forms mini packet HERE!

I am all about keeping things simple. There are a few things I want to discuss here. The first, is classroom helpers. I have probably tried ALL THE THINGS. Years ago, I used to do the whole thing where every kid got a classroom job each week and then you would move all the clips and I was like WHY!? Half the time I would forget to move the stupid clips. Then...I was like, I'll have the kids do it! But, they would do it wrong, or muck it on purpose...you know what I'm talking about. THAT kid who wanted to be the line leader again, even though he just did it two weeks ago. Clips would get dropped. It was just NOT working for me, if you catch my drift.
Then one day, I was reading Mrs. Cooley's blog, First Grader At Last, and I hit a gold mine. She literally has the simplest, most genius idea ever! You pick two kids a week - one boy and one girl. Slap all their names on rings and viola! Done. All I do is flip them each Monday! You can see Sarah's post HERE! I have NEVER looked back. EVER!
Last year I just typed all my student's names in a cute font on colored circles, cut them out and laminated them. Then, I hole punched them, put them on rings and hung them on my whiteboard. You can see below where they will hang. I didn't have them laminated yet for this picture.

The next thing I recommend doing each year is having a way to display what you are learning. You can see in the above photograph how I displayed my objectives for each subject. I have done this many different ways over the years. I used my Cameo to cut out vinyl letters and stuck them to my board. Then I printed a copy of each subject and slid them in a sheet protector and put them inside each rectangle.
If you wish to download and use my objective signs, you can click HERE and download them for yourself!
This coming year, I would love to do something like this from maneuveringthemiddle on Instagram!

Finally, I suggest putting together a sub binder or sub tub BEFORE the year begins. You NEVER know what life has in store for you. I recommend putting together at least five days worth of plans. There are tons of great resources on TPT out there for plans. I try to put together no fuss things. For example, for Math, I like to have students do dice or card games so I don't have to print a bunch of stuff and the kids aren't bored to death while you're out.
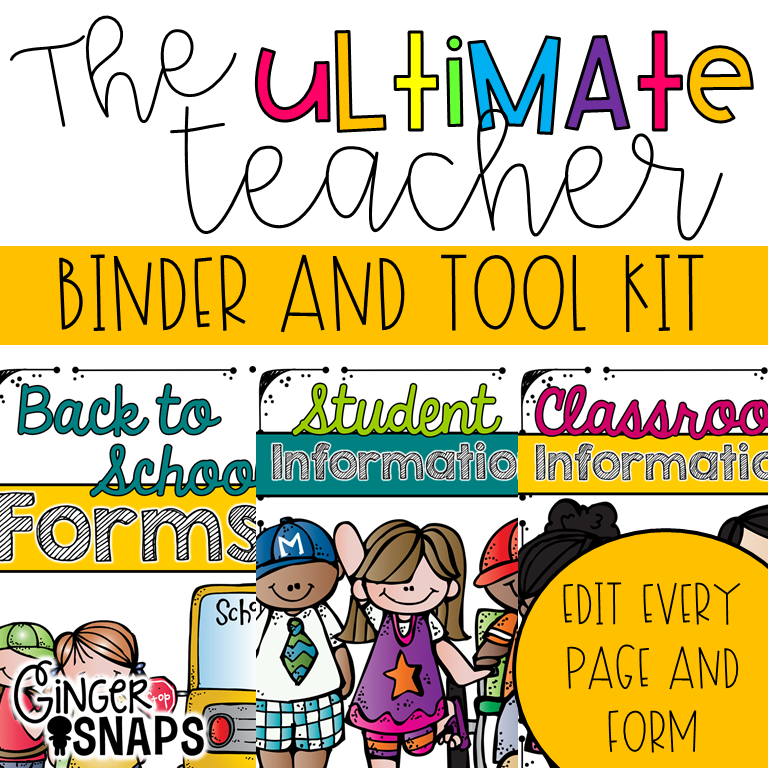
I have tons of sub pages for emergency procedures and lists available in my Ultimate Teacher Binder and Tool Kit.


I have also used Amy Groesbeck's Editable Sub kit which is great! You can get hers by clicking the picture below!


Anywho...don't make the mistake of putting this off until the last minute...TRUST.

Next up is something I have done for many years and has been huge in my classroom! My parents love it and it has been such a huge help in keeping kids organized. My parent communication binder goes to and from school each day! Many of you may already use these, but if you don't...you should be!
I don't have a picture of the fully assembled inside and outside binder that we used last year, but here is what the inside sort of looks like.

Each binder has a themed cover. We had a PIRATE theme last year, so that was the theme of the cover. I have several other options available in my TPT shop.

The inside front pocket of the binder is labeled with Sign and Return. The back pocket of the binder is labeled with Keep at Home. The zipper pouch is labeled with Notes and Lunch Money or whatever you wish. The colored folders are labeled as Homework and Graded Work. The clear plastic sleeves I do not label. I put students weekly newsletters in one. I also print out our grade level expectations and policies and they stay in there year round. I print out a class list to keep in the clear plastic sleeves as well. This may sometimes change depending on the transience of your class. I keep notebook paper in the back for students to complete their homework.
If you are interested in checking out my themed binder sets, just click on each image below!


It is important to start the school year on a positive note. Getting to know your students is one of the most important things you can do to make sure that you have a successful school year with your students.
One of my favorite ways to break the ice at the beginning of the year is to have a "Snowball Fight." Students get up and get moving, they have fun, and they get to know each other a little bit better. I give each students a piece of paper. I instruct them to write two things about themselves on the paper. Then they must ball it up and take position somewhere in the room. They are allowed only 30 seconds of throwing their paper balls and they must cease as soon as I call time. If they do not, they must sit out for the next round. They do NOT want to be THAT student. After time is up, each student picks up the nearest piece of paper and read it. I call on a few students to try to guess whose paper they picked up and then we go at it again. We do this a few more times and then we all share who is who. Everyone has a good time and we laugh and learn a little bit more about each other.
Another fun Icebreaker that I learned years ago at a Professional Development is a Musical Icebreaker. You play a short clip from a popular song. Students listen and think about a memory or connection they have to the song and write it on their paper. After the clip is over, call on students to share their connections. Do this with at least 5 songs. This is also a good way to gauge students writing abilities.
And finally, I think I have done this EVERY year I have taught. I allow students to do a gallery walk learning survey. I am big believer in having students move around instead of sitting all day. This is super simple and very effective. I like this because I don't have to sift through 20 papers to see what students like to do. I can just glance around the room! All you need to do is prepare the anchor chart questions ahead of time. I also like to have the sticky dots cut out out and sorted ahead of time as well. It can get time consuming to count out 6 sticky dots per kid if you wait until the last moment.


And last but not least, you have to start the year with off with great books! These are a few of my first week books!

Goldiscoks and the Three Libearians is the perfect books for teaching students all about selecting a just right book.
I hope you have been able to find something useful in this post!

Great post! I love doing gallery walk surveys. I usually give each kid a few labels with his or her name on them to place on the charts so I can see who chose which response.
ReplyDeleteThat is an excellent idea Sherry! I like the dots because they take up less space, but I can have students write their names on the dots!
DeleteI have updated the post and included a link to download them!
ReplyDelete